Log work on an issue
You can only log work on an issue if time tracking is enabled for the project, and if you have the correct permissions in the project to which the issue belongs.
When time tracking is enabled for an issue, a new section of the issue is created. The time tracking heading will appear on the right sidebar when you view the issue. It contains three colored bars, representing the following amounts of time:
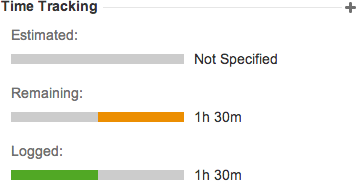
- Estimated (blue) — the original estimate of time needed to resolve the issue.
- Remaining (orange) — the remaining amount of time needed to resolve the issue.
- Logged (green) — the amount of time logged working on the issue so far.
When you log work on an issue, you:
- Log the time you have spent, in weeks, days, hours, and minutes. The total time spent is recorded and used for evaluating how resources are allocated. Logging work also affects Agile boards and sprint planning.
- Enter a description of the work you have done.
- Adjust the remaining and logged time counters.
Specify an original time estimate
The original estimate is the total amount of time thought to be needed to resolve the issue. If the original estimate has not yet been specified, you may want to specify it before you log any work. Once work has been logged on an issue, the original estimate cannot be changed.
To specify an original estimate:
- Select Edit from the actions toolbar.
- Set the estimated time in the Original Estimation field. You can edit this value up until work is logged against the issue. If work has been logged on the issue, you cannot change the recorded value; you can only add a new estimated time remaining.
- Click Update at the bottom of the screen.
Time is specified by a set of abbreviations. Use *w, *d, *h and *m to specify weeks, days, hours or minutes (where * is any number). For example, to specify six hours, type 6h. To specify two weeks, three days, and four hours, type 2w 3d 4h.
Log work on an issue

To log work on an issue:
- Under the time tracking header, click the + button.
- In the Time Spent field, enter the amount of time you've spent working on the issue. See the note below on how to enter this field.
- In the Start Date field, click the calendar icon to select the date and time when you started work.
- From the Remaining Estimate field, select from one of the following:
- Auto adjust subtracts the time you're logging from the issue's current remaining estimate.
- Use existing estimate does not change the remaining time.
- Set to allows you to manually add time to the issue's remaining estimate. Enter your new estimate into the blank field.
- Reduce by allows you to manually reduce the issue's remaining estimate. Enter your new estimate into the blank field.
- In the Work Description field, type a description or comment about the work you have done.
- In the Log Viewable By field, you can either set this work log to be viewable by all users with access to the project, or internal Opera employees only. Users must have the required permissions to view work log details.
- Click the Log button to return to the issue.
Once work has been logged on an issue, various reports based on the time-tracking information become available.
Note: Time is specified by a set of abbreviations. Use *w, *d, *h and *m to specify weeks, days, hours or minutes (where * is any number). For example, to specify six hours, type 6h. To specify two weeks, three days, and four hours, type 2w 3d 4h.
Edit a work log entry
To edit a work log entry:
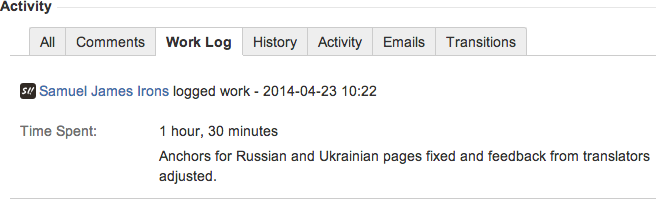
- Under the activity header, select the Work Log tab.
- Locate the work log entry you wish to edit and hover your mouse over the entry.
- Click the Edit icon that appears to the right side.
- Edit the fields as required, see Log work on an issue for details.
- Click Log.
Depending on your level of access, you may be able to edit other people's work log entries.
Delete a work log entry
To delete a work log entry:
- Under the activity header, select the Work Log tab.
- Locate the work log entry you wish to delete and hover your mouse over the entry.
- Click the Delete icon (trash can) that appears to the right side.
- Adjust the time estimation as required. See details on the options for further explanation.
- Click Delete to confirm the deletion and return to the issue.
Depending on your level of access, you may be able to delete other people's work log entries.